
I’m going to walk you through my personal experience with the Keystone 3 Pro cold wallet, from the moment I unboxed it to how it’s handled my crypto storage needs.
In my Keystone 3 Pro review, I’ll share what I liked about its security features and design, but also be super honest about the little things that didn’t quite hit the mark for me when using it.
Keystone 3 Pro Wallet Review: Quick Summary
| Feature | Specification / Detail |
| Security Chip(s) | Triple EAL5+ Secure Element (SE) chips: Microchip ATECC608B, Maxim DS28S60, Maxim MAX32520. All are PCI certified. |
| Connectivity | Air-gapped (primarily via QR codes and MicroSD card). USB-C is for charging only. No Wi-Fi, Bluetooth, or NFC. |
| Screen Size | 4-inch (color touchscreen) |
| Screen Resolution | 480 x 800 pixels |
| Screen Type | Full-color LCD Touchscreen |
| Battery Capacity | 1000 mAh / 3.7 Wh (rechargeable Li-ion battery) |
| Dimensions (L x W x H) | 103.9mm x 62.5mm x 12.9mm (or 62.44 x 103.9 x 12.08 mm) |
| Weight | 103 grams |
| Materials | PC + ABS |
| Operating System | Custom developed (not Android-based, focuses on security) |
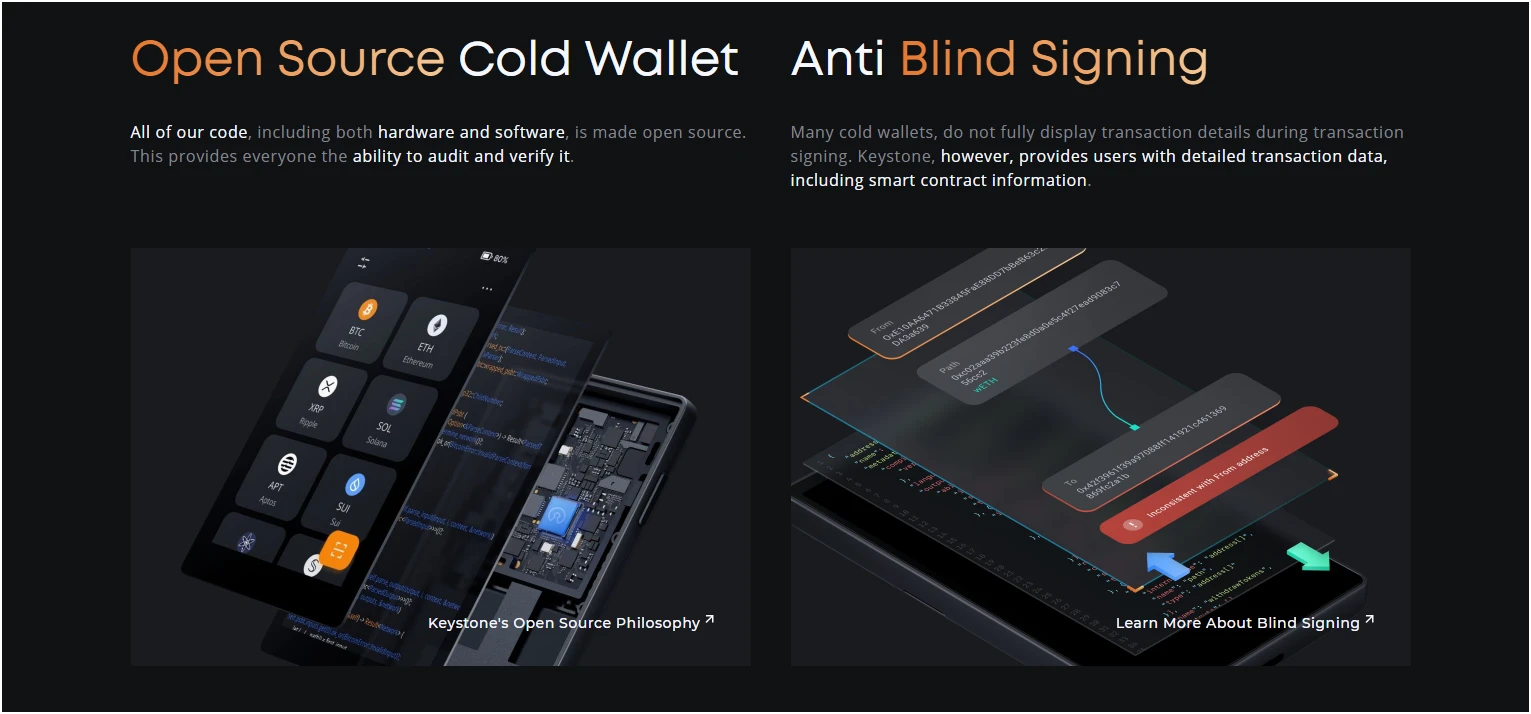
| Open Source Status | Hardware and Firmware (software) are open source. |
| Anti-Tamper Mechanism | Automatically erases all sensitive data (including private keys) upon detected physical interference or disassembly. |
| Biometric Authentication | Fingerprint sensor |
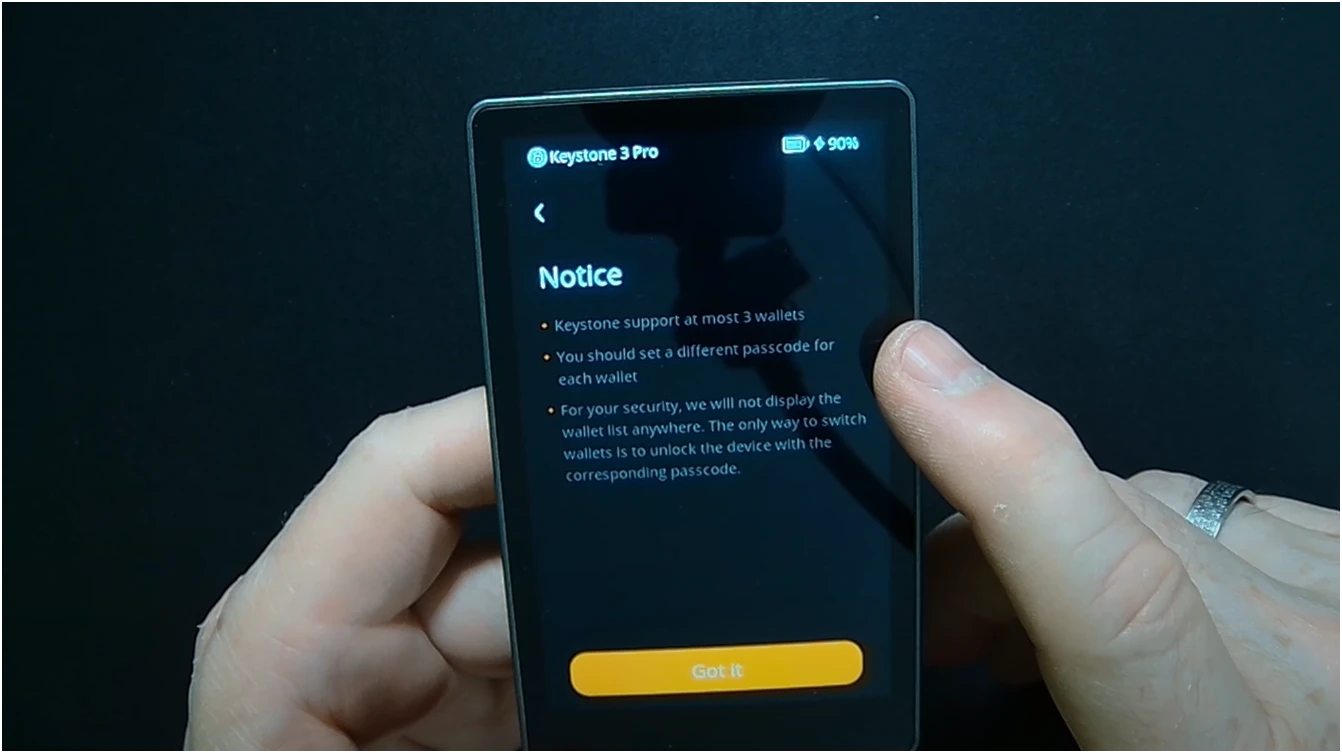
| Multi-Seed Phrase Support | Supports management of up to 3 unique seed phrases (each with a separate PIN/passphrase). |
| Cryptocurrency Support | 5,000+ cryptocurrencies, 200+ blockchains, and compatible with 35 wallets (e.g., MetaMask, OKX Wallet, BlueWallet). |
| Price | $129 |
| Staking and NFT Support | Yes (But with a third-party wallet like MetaMask) |
My Honest Take on Keystone Wallet For Everyday Use
Okay, so I finally got my hands on the Keystone 3 Pro, and the first thing I noticed was its solid feel. It looks pretty sleek, honestly. The whole air-gapped design is fantastic. No Wi-Fi, no Bluetooth, no USB connection.
The fact that it uses 3 CC EAL6+ security chips makes me feel even better about storing my funds here. Plus, the open-source firmware is a huge win for transparency; you know there are no hidden surprises in the code.
Now, for the parts that aren’t so smooth. The missing MicroSD card in the box is a bit of a pet peeve. If you’re into staking, you can’t do it directly on the Keystone 3 Pro. You have to move your crypto to a software wallet to stake, and then ideally move it back.
And honestly, the QR code scanning can be a bit slow at times. I’ve had moments where I’m trying to sign a transaction, and it just takes a bit longer than I’d like, or occasionally it even fails, meaning I have to try again.
So, I would say 3 Pro is best for long-term storage and security, but it may not be convenient for daily use due to back-and-forth air-gapped transaction signing.
The Features I Really Like
Just to sum up, the feature I like about my Keystone 3 Pro wallet is are air-gapped design, touchscreen display, 3 SE chips, 35+ software wallet compatibility, Bitcoin-only firmware, and support for almost all coins, chains, and tokens.
Air-Gapped QR Code-Based Transaction Signing
Now, when I first heard about “air-gapped” security, I’ll admit, it sounded a bit techy. But with the Keystone 3 Pro, it’s just brilliant in practice.
My wallet literally never connects to the internet, Bluetooth, or USB when I’m signing transactions. Everything happens through QR codes.
This is how it works:
“I initiate a transaction on my phone with a software wallet, and a QR code pops up. I have to scan that QR code with my Keystone 3 Pro’s camera. The wallet then processes the transaction details offline, asks for my confirmation, and then generates another QR code on its screen. I just scanned that second QR code with my phone again, and the transaction is broadcast.”
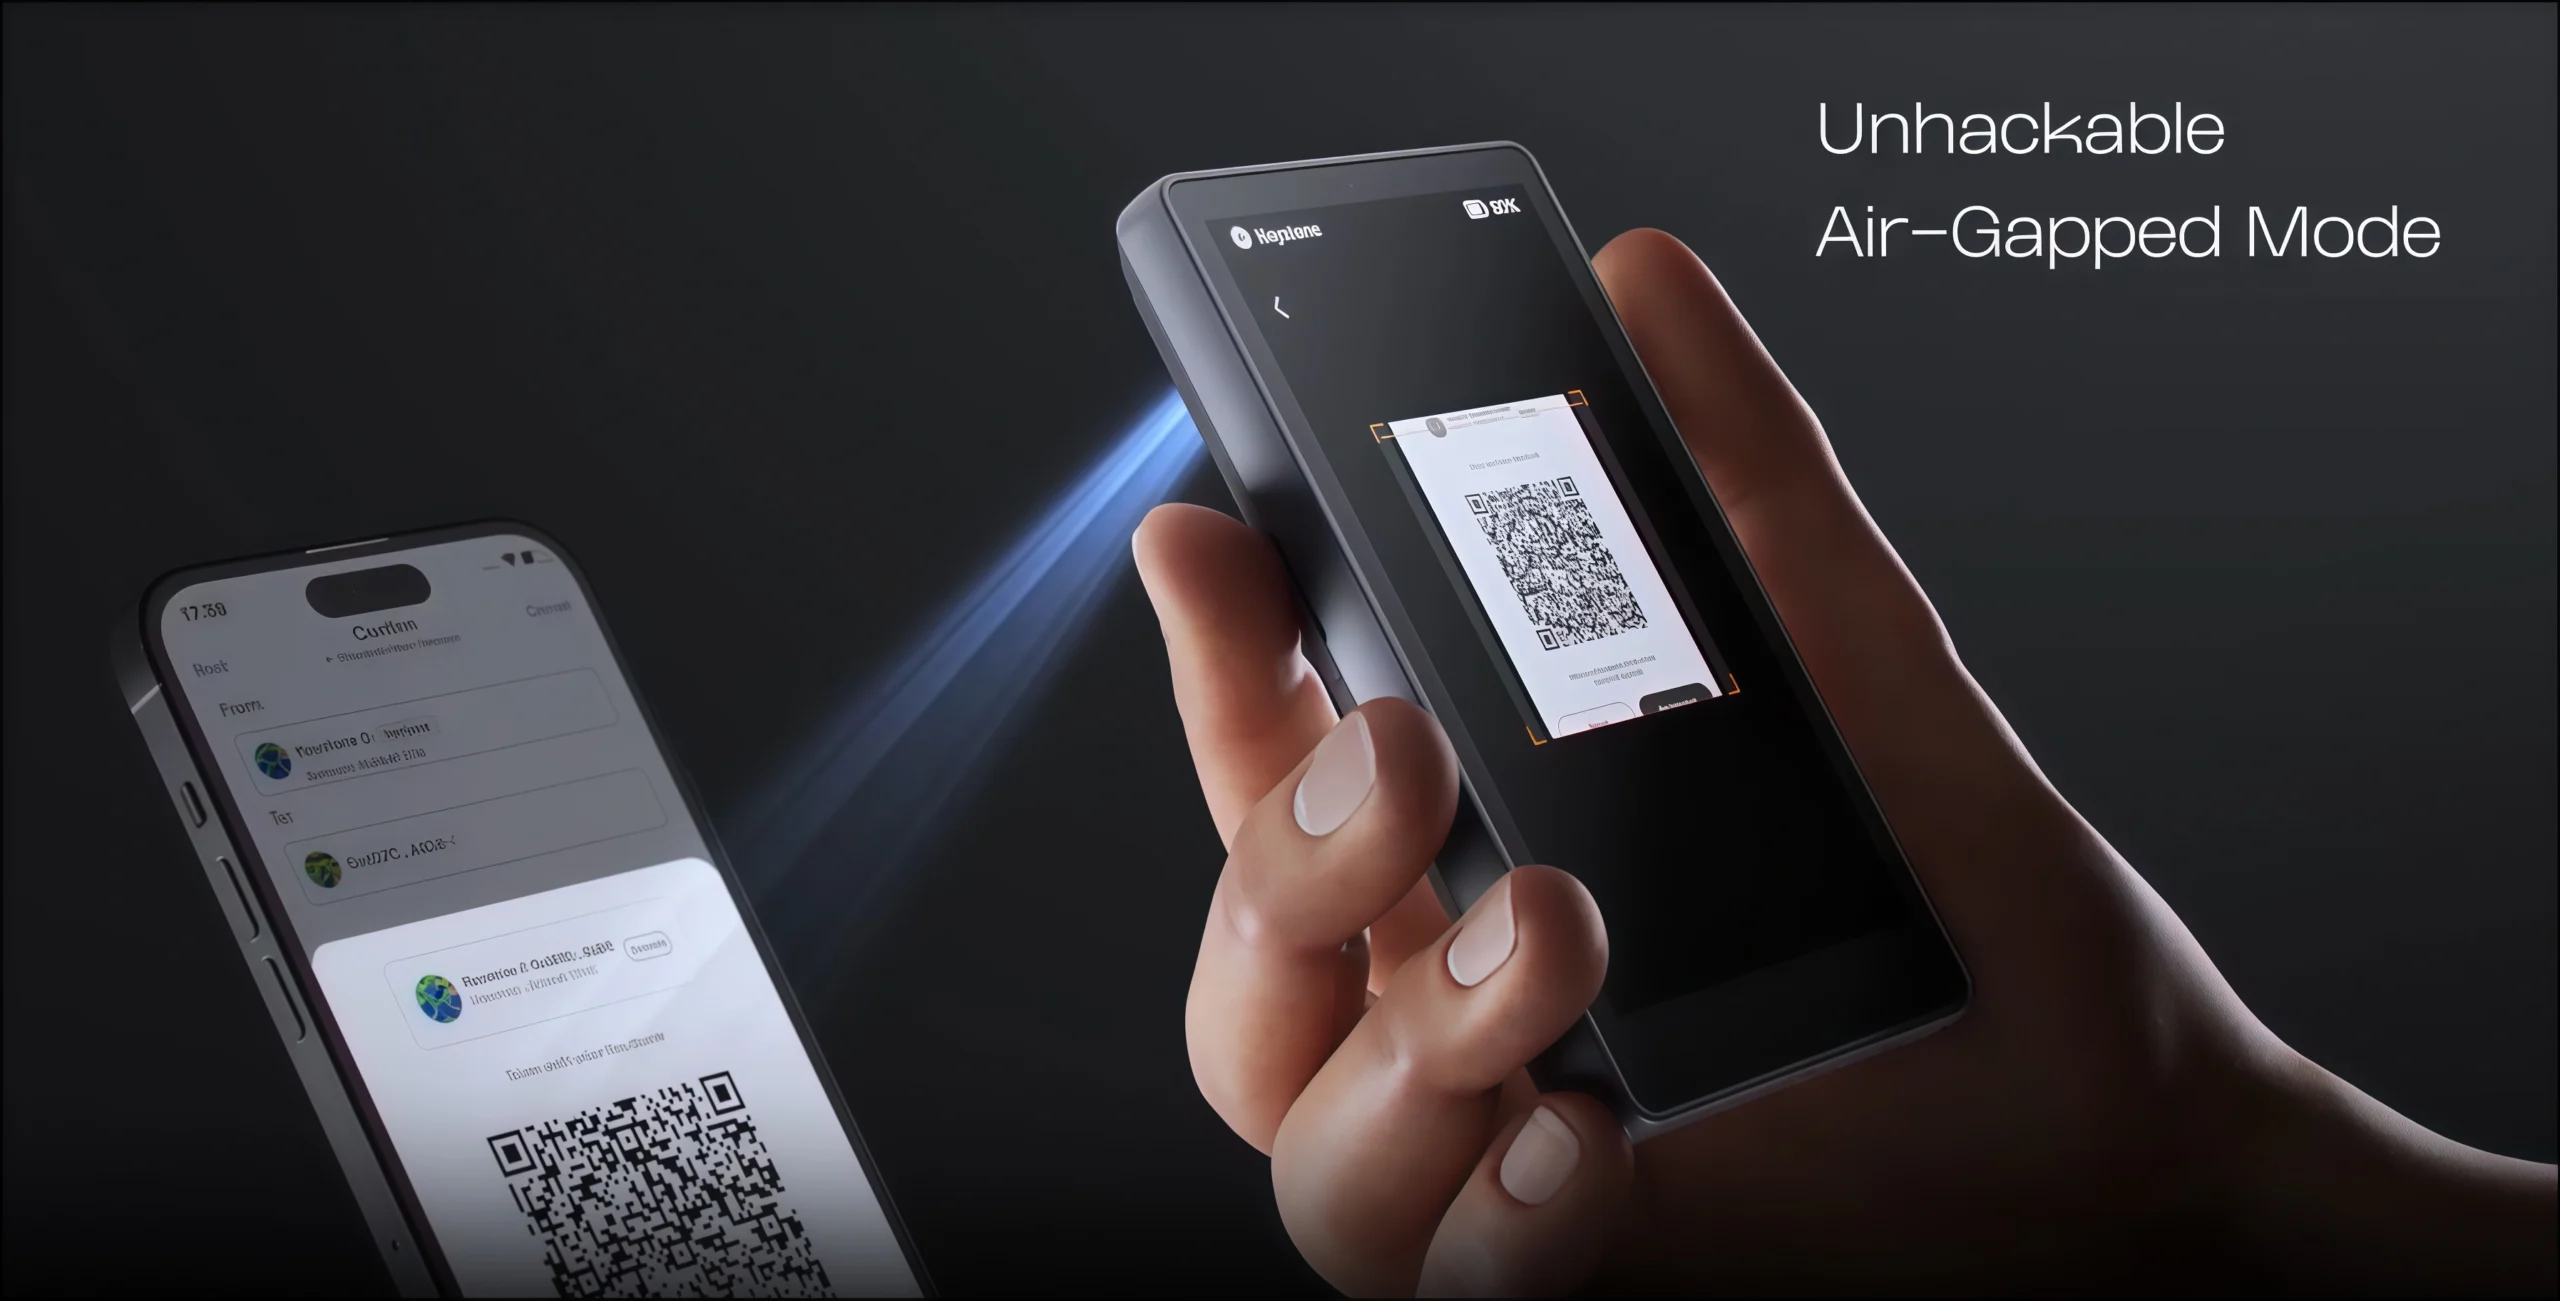
The whole process means my private keys are never exposed to an internet-connected device. It creates a physical gap between your sensitive information and any online vulnerabilities.
For me, this is a massive peace of mind. Other hardware wallets might use USB or Bluetooth, but this pure air-gapped approach with QR codes feels inherently safer.
4-Inch Touchscreen Display Is Easy to Use
You know how some hardware wallets have tiny, almost unreadable screens. Keystone 3 Pro boasts a beautiful 4-inch color LCD touchscreen with a resolution of 480×800 pixels. I feel like using a mini-smartphone, which makes the whole experience so much less intimidating.
Well, for starters, when I’m confirming a transaction, all the details are laid out clearly. The large display helps combat “blind signing,” which is where you might accidentally approve a malicious transaction because you couldn’t clearly see the details.
Now, with this screen, I can easily see every single character of the address, the exact amount, and the network fees, all in a human-readable format.
It also makes navigating the menus and settings a breeze. Setting up wallets, adjusting preferences, or even performing a seed phrase check – it’s all intuitive with simple taps.
3 Secure Element Chips and Shamir Backup
The Keystone 3 Pro comes with three independent secure element chips. They’re high-grade, meeting stringent security standards, and this type of chip is often found in banking and government applications (like EAL5+ certified chips).
These chips act like a highly secure vault for my sensitive information, especially my seed phrase and biometric data. Each chip handles different critical tasks, working together to create this super robust security environment.
So, even if someone were to physically mess with the device, there are “PCI-level anti-tamper features” that will automatically wipe the data to protect your assets.
And then there’s the Shamir Backup, which is an advanced way to protect your seed phrase.
Instead of one single recovery phrase, Shamir Backup (based on Shamir’s Secret Sharing algorithm) lets you split your seed phrase into multiple “shards.” Here, you can have three shards, but you only need two of them to recover your wallet (a 2-of-3 setup).
This means if you lose one shard or one falls into the wrong hands, your crypto is still safe. It adds an incredible layer of redundancy and decentralization to your backup strategy, so you’re not relying on a single point of failure.
During my Keystone 3 Pro review, I found It a bit more advanced to set up than a regular 24-word seed.
Multiple Software Wallet Support (Including MetaMask)
Now, another best part, the Keystone 3 Pro supports many software wallets. It works very well with MetaMask mobile, too. You know, most of us use MetaMask for DeFi on Ethereum and compatible chains.
To be exact, Keystone 3 Pro supports 35+ software wallets. You can use Solflare for Solana, MetaMask, and Rabby for EVM chains, and even the OKX wallet.

You can easily explore Web3, use smart contracts, trade tokens, check NFTs, and everything else these software wallets offer. I also found it very convenient to use. You just have to open a QR code on the Keystone, scan it with the MetaMask app, and it’s linked.
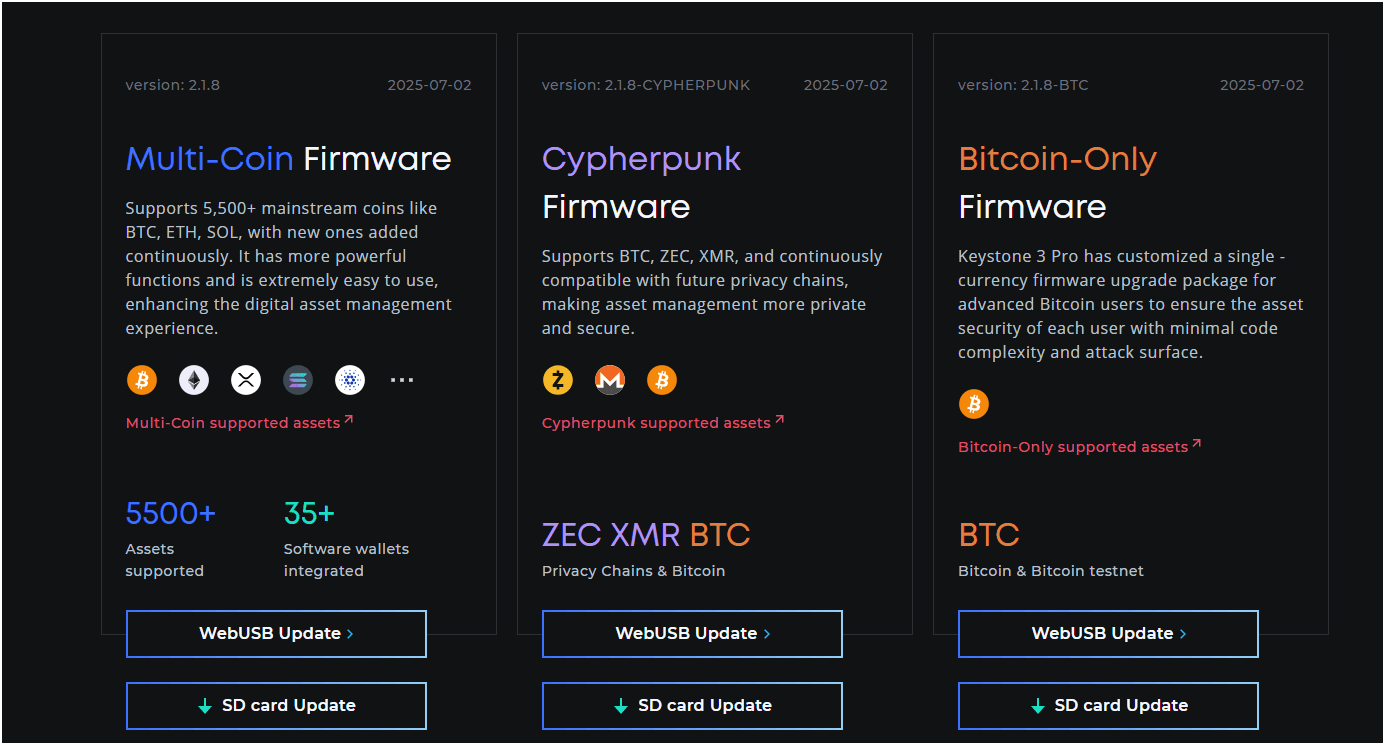
Bitcoin-Only Wallet Option
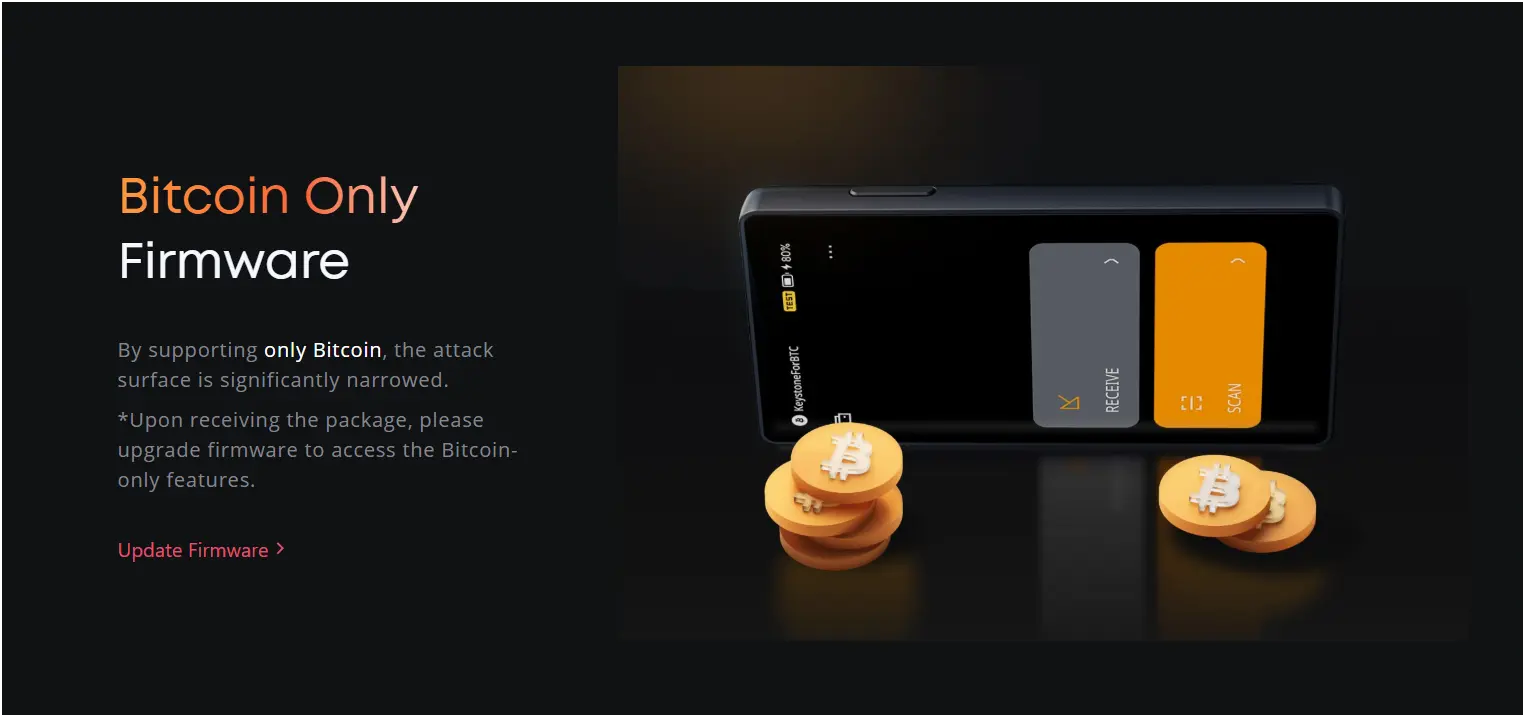
A great feature for people who only use Bitcoin or just want extra security. The Keystone 3 Pro has a specific Bitcoin-only firmware. Hence, no Ethereum, no Solana, no other coins – just Bitcoin.
For security, it makes the device less open to attacks. Every extra coin or chain adds more code. And, more code can mean more weaknesses.
With a Bitcoin-only option, the software is simpler. It focuses only on securing Bitcoin transactions. Keystone supports both legacy and SwgWit BTC addresses.
Support For Almost All Coins and Chains
I just talked about the Bitcoin-only option. But the great thing about the Keystone 3 Pro is that it also supports different types of crypto.
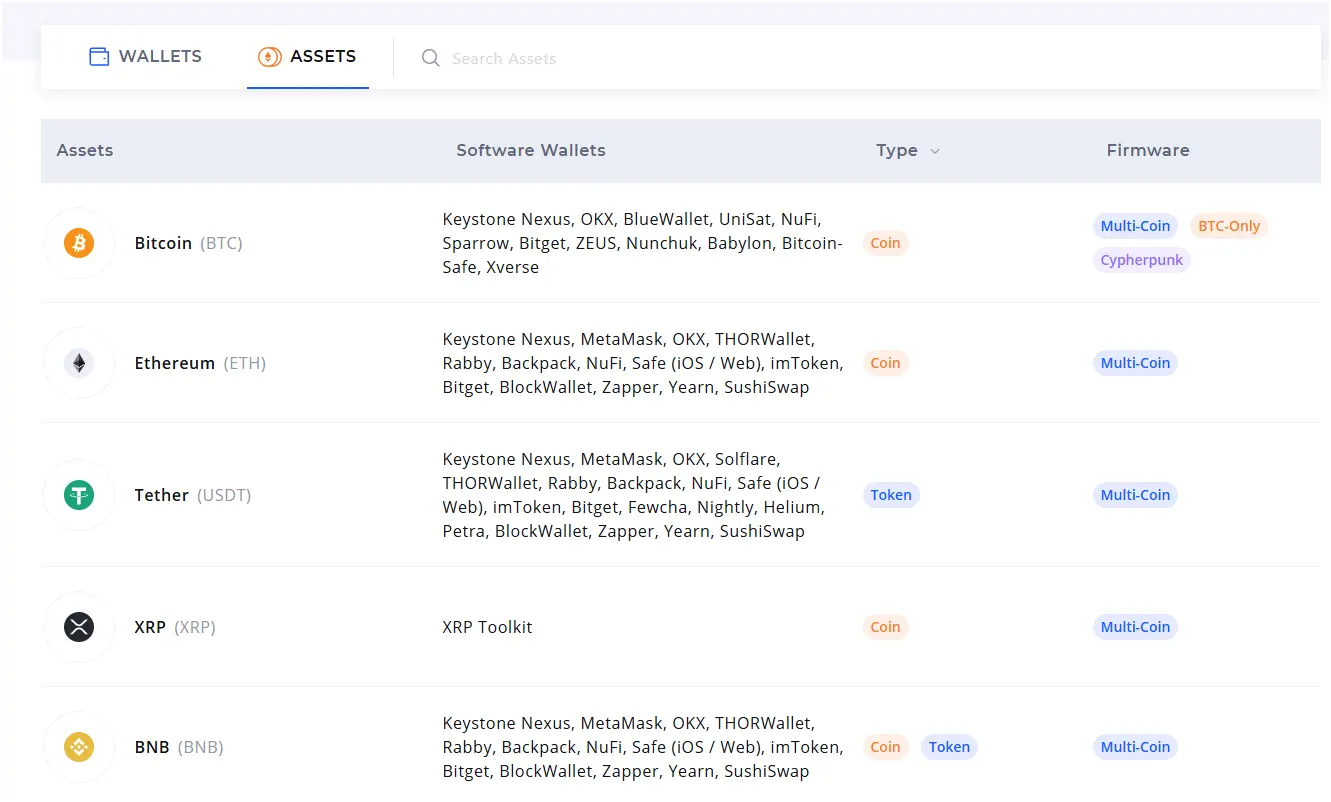
To be exact, it supports over 5,500 different cryptocurrencies and tokens across more than 200 blockchains. You will find all options like Bitcoin (besides the Bitcoin-only firmware), Ethereum, USDT, XRP, BNB, Solana, Cardano, and almost all ERC-20 tokens, plus many more.
Now, if you use a software wallet, this number goes to storing millions of supported tokens on EVM blockchains. Hence, whether I’m using chains like Polygon, Arbitrum, or BNB Smart Chain, or others like Solana, Cosmos, Sui, or Aptos, the Keystone 3 Pro handles it.
The Issues I Faced With My Keystone Hardware Wallet
The cons of using Keystone 3 Pro hardware wallet are: MicroSD card must be purchased separately, no native staking support like Ledger, and transactions take time with air-gapped signing (may fail during high volatility).
MicroSD Card Is Not Included In the Box (Purchase Separately)
Now, I discussed this, the Keystone 3 Pro is designed to be “air-gapped,”. It never connects to the internet directly via USB, Wi-Fi, or Bluetooth. Instead, it uses QR codes or a microSD card to send and receive data.
But the MicroSD card needed for actions like firmware updates or for handling larger transaction data (especially if you’re dealing with lots of UTXOs for Bitcoin, for example) isn’t included in the box.
Now, I know a MicroSD card isn’t super expensive, maybe a couple of hundred rupees (a few dollars), but it’s just one of those little annoyances.
Remember, MicroSD is not mandatory for firmware update, you can also use a USB-C cable. But to maintain it’s air-gapped security, you need microSD card to update wirelessly.
Transactions May Fail (Air-Gapped Signing Takes Time)
This one is less about the wallet failing completely and more about how the air-gapped nature can sometimes make things a bit… slow and prone to errors if you’re not careful.
When you want to send crypto using the Keystone 3 Pro, it’s a multi-step process involving QR codes.
Here’s how it usually works:
You create the transaction on your computer or phone using a compatible software wallet (like MetaMask or Sparrow Wallet), and it generates a QR code. You then use the Keystone 3 Pro’s built-in camera to scan this QR code.
The Keystone reads the transaction data, you review it on its large screen, and then you sign it internally with your private key. After that, the Keystone generates another QR code, which you then have to scan back with your computer or phone to broadcast the signed transaction to the blockchain.
The issue I’ve run into is that sometimes, the scanning process, both ways, can sometimes be a bit finicky. It might take several tries to get the camera to read the QR code correctly, or the software wallet might struggle to read the signed QR code from the Keystone.
This “air-gapped signing” can take time, maybe 30 seconds to a minute or more per scan if you’re having issues, which can add up.
If there’s a network congestion and your transaction needs to go through quickly, or if you’re in a hurry, this back-and-forth scanning can be frustrating and occasionally lead to transaction failures if the connection between the QR codes isn’t perfect, or if the wallet on your computer/phone times out.
It’s secure, yes, but definitely not as quick as a USB or Bluetooth connection.
No Native Staking Feature
Okay, so for me, earning a little extra crypto through staking is always a nice feature. We talked about how Ledger Live offers native staking in my Ledger Nano X review.
Well, the Keystone doesn’t have a built-in “native staking” feature directly within its own ecosystem or companion app.
This doesn’t mean you can stake coins. You can still do it, but you’ll need to go through third-party software wallets or platforms.
For example, you’d connect your Keystone to a wallet like MetaMask (for Ethereum-based staking) or another specific wallet that supports the coin you want to stake. Then, you’d use that software wallet to interact with the staking protocol. Your Keystone would still be used to sign the staking transactions.
But this adds extra steps and means you don’t get that seamless “earn” section directly within your wallet interface, like with Ledger. You have to understand how to connect your Keystone to different software wallets and navigate their staking interfaces, which can be a bit more complex for someone new to crypto.
Obviously, it’s not a deal-breaker for advanced users, but for a beginner looking for a simple way to stake and earn rewards while keeping funds secure, the lack of native staking can be a bit of a letdown.
How Keystone Stacks Up Against Other Cold Wallets?
The top alternatives to a Keystone 3 Pro hardware wallet are Ledger Nano X, ELLIPAL Titan 2.0, and Trezor Safe 5.
For me, the Keystone 3 Pro’s biggest pro is that air-gapped security. You’re always scanning QR codes, so it feels very isolated, almost like a dedicated secure calculator.
Now, this is different from the Ledger Nano X, which uses Bluetooth, or the Trezor Safe 5, which plugs in directly. The Keystone and ELLIPAL Titan 2.0 are in a similar boat with the QR code thing, but the Keystone uses “3 secure chips” which is pretty unique.
| Feature | Keystone 3 Pro | Ledger Nano X | ELLIPAL Titan 2.0 | Trezor Safe 5 |
| Secure Element | Yes (3 PCI-certified chips) | Yes (CC EAL5+ certified) | Yes (CC EAL5+ certified) | Yes (NDA-free EAL6+ certified) |
| Connectivity | QR code, MicroSD Card (USB-C for charging only) | USB-C, Bluetooth | QR code (USB-C for charging only) | USB-C, MicroSD Card |
| Screen | 4-inch color touchscreen | 1.09-inch monochrome OLED | 4.0-inch color touchscreen | 1.54-inch color touchscreen |
| Battery | 1000 mAh (rechargeable) | 100 mAh (rechargeable, non-replaceable) | 1400 mAh (rechargeable) | No (USB-powered) |
| Crypto Support | 5,500+ (via companion app) | 5,500+ (via Ledger Live) | 10,000+ (via Ellipal app) | 8,000+ (via Trezor Suite) |
| Native Staking | No (via 3rd party) | Yes (via Ledger Live) | No (via 3rd party) | Yes (via Trezor Suite) |
| App Storage (on device) | Unlimited | Approx. 2 MB | Unlimited | N/A (Firmware handles coins, no app install) |
| Price (approx. USD) | $129 | $149 | $119 | $149 |
| Open Source | Yes (Hardware & Software) | Partially | Partially | Yes (Hardware & Software) |
I have also reviewed Ledger Stax wallet, you can check that out too…
Is Keystone 3 Pro Better Than Ledger?
I am someone who has used both Ledger and Keystone hardware wallets. So, is the Keystone 3 Pro actually better than, say, a Ledger or a Trezor? My honest answer is yes, it is better than these popular crypto wallets.
Let’s say, if you’re someone who is extremely security-focused, like, “I want absolutely no physical connection to the internet ever,” then the Keystone 3 Pro’s air-gapped design is pretty much as good as it gets.
For someone who doesn’t mind the slightly slower transaction process that comes with scanning QR codes back and forth, then the Keystone could feel “better” for them in terms of pure isolation.
However, if you value a bit more convenience, things like native staking directly in the app, or the ease of a quick Bluetooth connection. You should go for Ledger devices, like Nano X or Flex.
You know that Ledger and Trezor offer a more integrated software experience with their companion apps, which can always be a smoother ride for beginners.
Keystone 3 Pro Review: Unboxing and First Impression
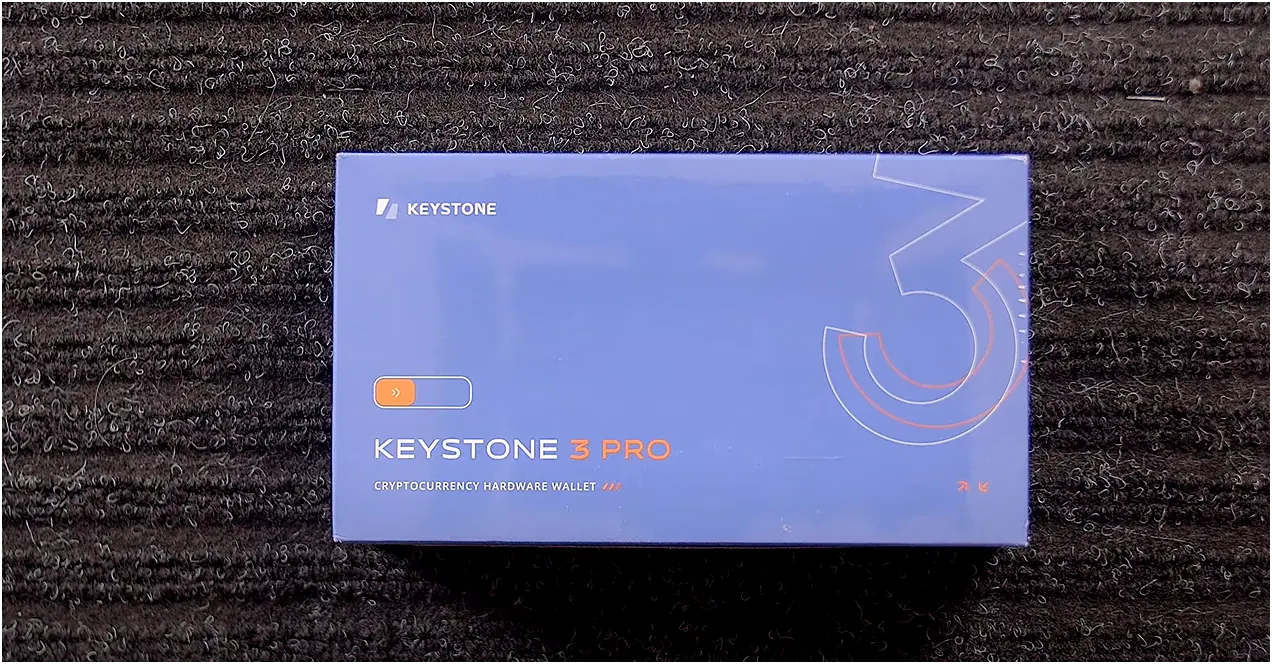
When the Keystone 3 Pro box arrived, it was pretty sleek and modern-looking. It’s a compact box, nothing too flashy, with a nice blue and orange design that catches your eye.
Once you slide open the box, the first thing you see is the Keystone 3 Pro itself. And let me tell you, this device feels solid. It’s got a good weight to it, almost like a mini smartphone, with a nice, sturdy plastic build. Mine was the standard black, but it looks really clean.
The front is dominated by a large, 4-inch full-color touchscreen, which is one of the biggest screens you’ll find on a hardware wallet. It’s bright and clear. Backside, there is a camera and a fingerprint sensor.
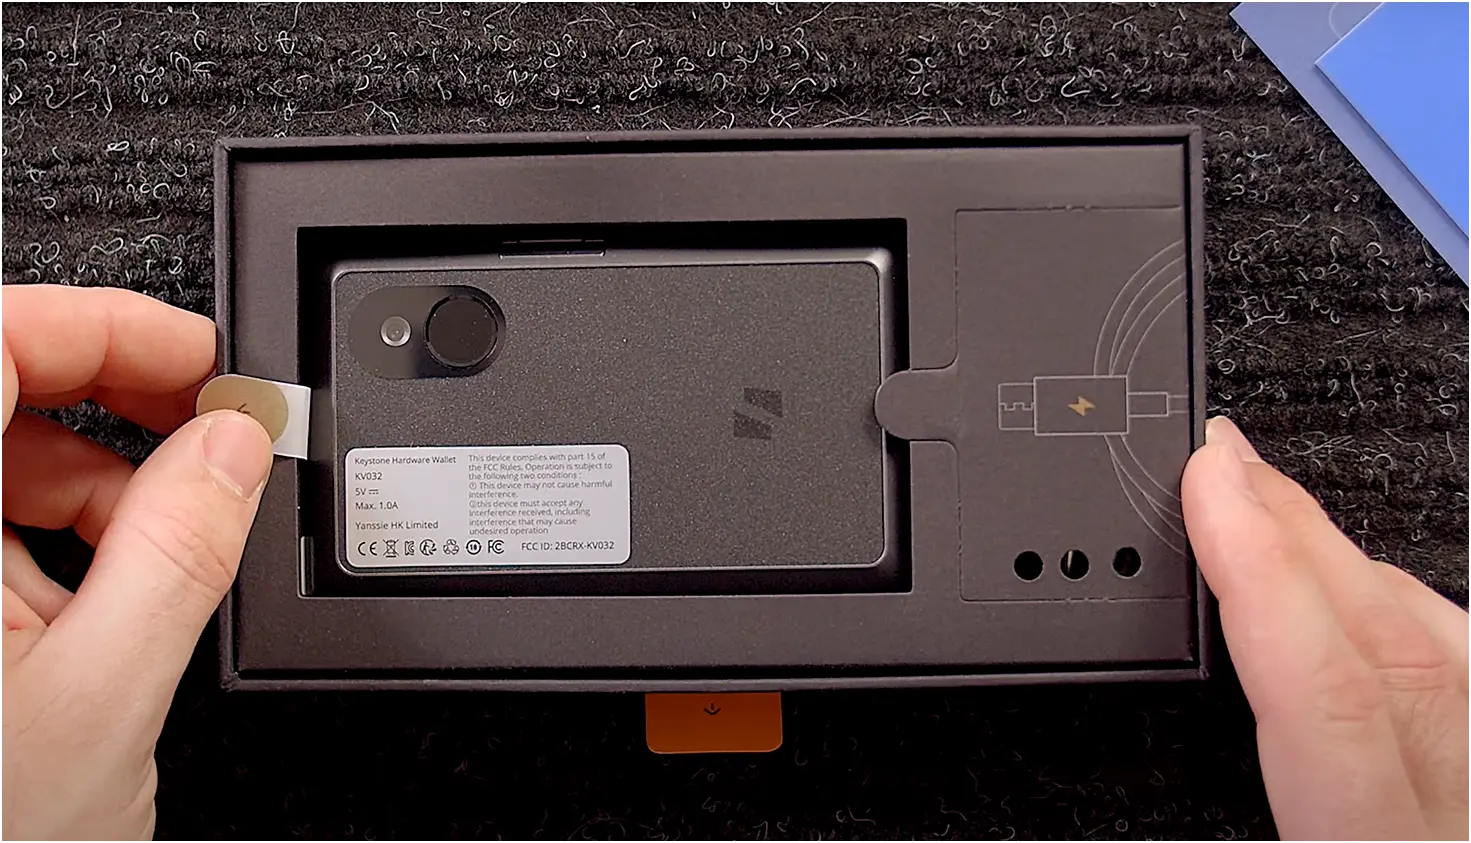
Underneath the device, like most hardware wallets, you find the accessories. Here’s what came in my box:
- The Keystone 3 Pro device
- A USB-C to USB-A cable: It’s only for charging the device. The Keystone 3 Pro doesn’t use USB for data transfer for its main operations; it’s air-gapped.
- Recovery sheets
- A “Quick Start Guide” booklet
- A little coupon code
One thing I quickly noticed, which I mentioned before, and it’s a minor annoyance, is that there was no microSD card included. So, heads up, you’ll likely need to pick one up separately if you don’t already have one.
Initial Setup and Getting Started
Setting up the Keystone 3 Pro is a bit different from a Ledger because it focuses heavily on being air-gapped from the start. You’re not plugging it into your computer to get going, at least not for data.
Charge It Up: First, I plugged the Keystone 3 Pro in using the included USB-C cable to make sure it had enough battery. It has a 1000 mAh internal battery, which is pretty good for a device like this. You want at least 20% charge before starting setup.
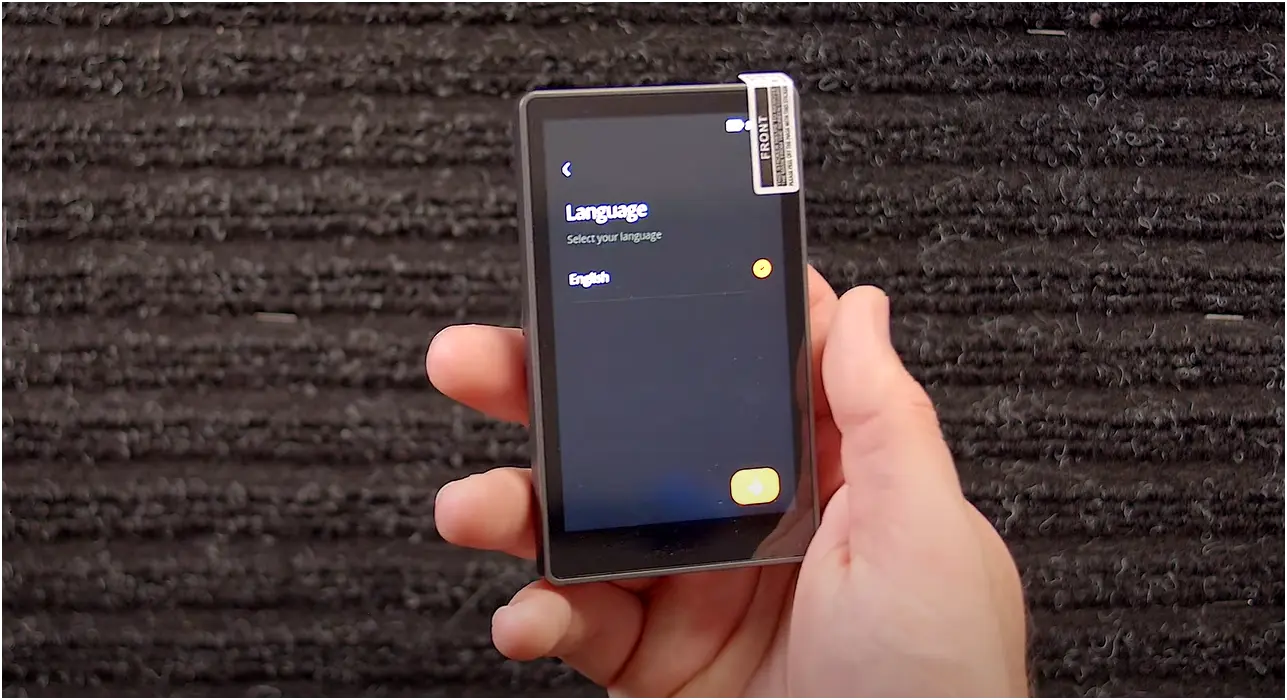
Choose Your Language: Once powered on, the first prompt was to select my preferred language. Simple enough, just tap and select.
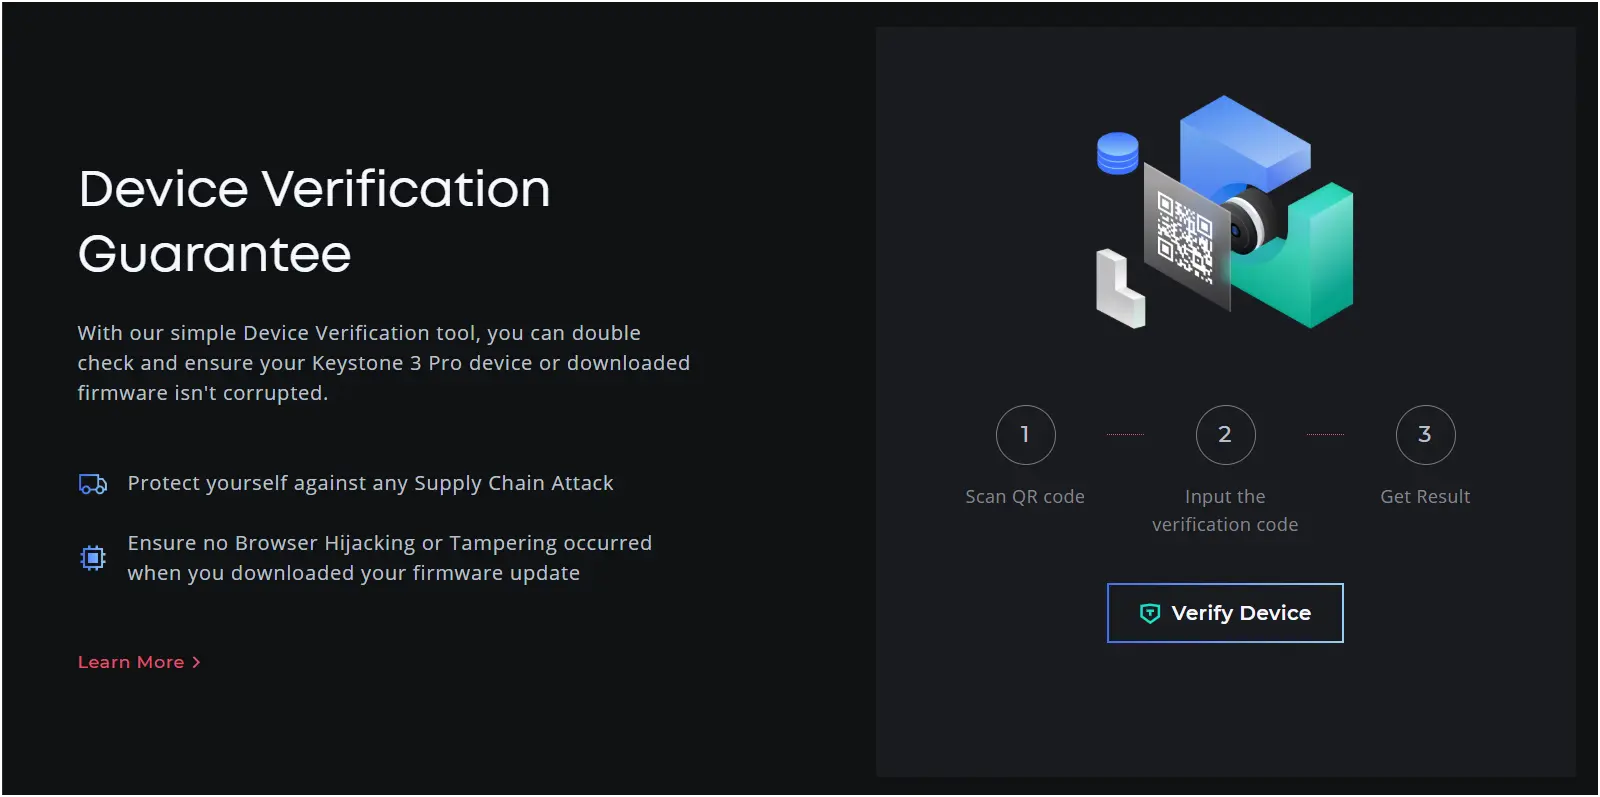
Device Verification (Optional, but Recommended): Keystone suggests verifying your device’s authenticity. This is done by connecting to their official website on your computer and scanning a QR code shown on the website with the Keystone’s camera. The Keystone then displays a code, which you enter back on the website to confirm it’s a genuine device. I did this step, and it was straightforward.
Firmware Update (Crucial, and this is where that MicroSD card might come in): This step is really important. Out of the box, your device might not have the very latest firmware.
Keystone offers two ways to update firmware
- Via MicroSD card (the preferred air-gapped method): If your firmware version is old, you have to use a MicroSD card. You need to download the firmware file (usually a .bin file like keystone3.bin) from the official Keystone website onto a FAT32 formatted MicroSD card. Then you have to insert the card into the slot on the Keystone and follow the on-screen prompts to update. This keeps the update process entirely offline.
- Via USB Cable (for newer firmware): If you already have some previous latest firmware versions, you can update directly via USB by connecting it to your computer and going to their website. This is still just for updating, not for signing transactions.
Also, it offers three types of firmware: Bitcoin-only, multi-coin, and Cypherpunk (for privacy-focused coins).
I chose the MicroSD card method to stick with the air-gapped principle since my device was fresh out of the box.
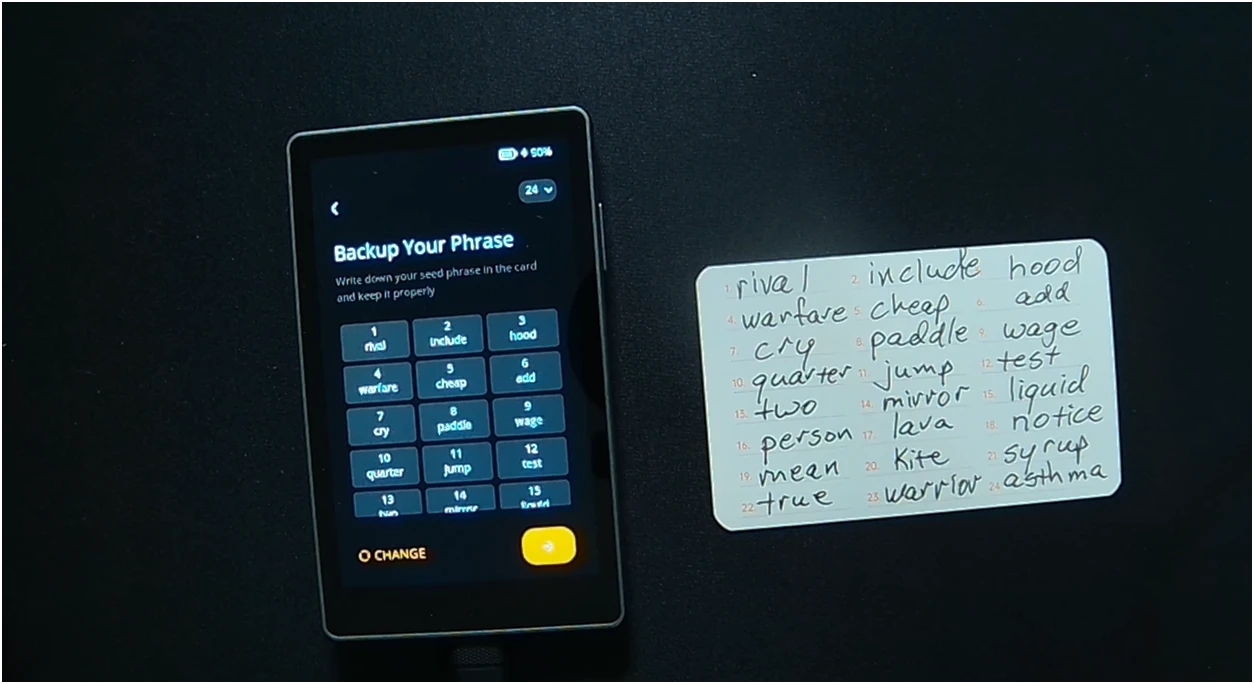
Create or Import Your Wallet
Create New Wallet: The device gives you the option to generate a 12 or 24-word recovery phrase (seed phrase). I chose 24 words for maximum security. The words appear on the large screen, and you absolutely must write them down carefully and accurately on the provided recovery sheets.

Confirm Recovery Phrase: The Keystone then asks you to confirm a few words from your phrase. And it is to make sure you wrote them down correctly. You pick them from a list on the screen.
Set a PIN: After the recovery phrase, you set a numerical PIN code (usually 6-8 digits) to unlock your device. You tap it in on the touchscreen.
Fingerprint Setup (Optional but Recommended): The Keystone 3 Pro has a fingerprint sensor on the back. You can set this up for quick unlocking or transaction approval. It’s a nice convenience feature and adds another layer of security. I set mine up.
Multiple Wallets/Seed Phrases: A cool feature here is that the Keystone 3 Pro allows you to manage up to three distinct recovery phrases (essentially three different wallets) on one device. Each can have its own PIN or passphrase. This is pretty unique and handy if you want to separate your funds.
The whole unboxing and initial setup, including the firmware update via MicroSD, took me about 25-35 minutes. It felt deliberate because of the air-gapped steps, but the large touchscreen made inputting the PIN and confirming words much easier than on smaller hardware wallets.
Receiving Coins on Your Keystone Device
Open Your Keystone 3 Pro and Select Your Wallet: First, power on your Keystone and unlock it using your PIN or fingerprint. Then, on the large touchscreen, navigate to the specific wallet (if you have multiple) and the specific cryptocurrency you want to receive.
Generate the Receiving Address: Once you’ve selected the coin, you’ll see an option like “Receive” or a QR code icon. Tap that. The Keystone will then display a unique receiving address on its screen.
Share the Address: Once you’ve verified it, you can either:
- Scan the QR code: If the sender is right there with you, they can just scan the QR code directly from your Keystone’s screen with their crypto app.
- Manually copy: You can write down the address (though this is risky due to typos), or often, the software wallet you have connected to your Keystone (like MetaMask or BlueWallet) will also show the address after you’ve connected it. You can copy it from there to send to the person.
Sending Coins from Your Keystone 3 Pro
You need to start on your software wallet (like MetaMask), enter details, and it will show a QR code. You have to then scan this QR code with your Keystone.
Review all the transaction details very carefully on the Keystone’s big screen, then sign it with your PIN/fingerprint. Your Keystone then shows a new signed QR code, which you scan back with your phone to broadcast the transaction.
Who is It Best For?
- People who want an air-gapped wallet: Keystone uses QR codes for everything, so there’s no USB, Wi-Fi, or Bluetooth connection for transactions. The seend phrase is completely isolated offline, even boasting three independent Secure Element chips for top-notch security.
- People who want a touchscreen wallet: The Keystone 3 Pro has a large 4-inch full-color touchscreen. This big screen makes reviewing transaction details super clear and easy to read. It also makes entering your PIN or confirming words much more straightforward, and it even has a fingerprint sensor for quick unlocking.
- People who want a MetaMask-compatible cold wallet: Even being air-gapped, the Keystone 3 Pro works well with MetaMask, both the browser extension and the mobile app. This lets you securely interact with tons of dApps and NFTs on Ethereum and other compatible blockchains like Polygon. You can use MetaMask to browse, but your Keystone signs every transaction offline using those QR codes
You can also check out my list of the best crypto hardware wallets…
What Security Features Does Keystone Offer?
I have already discussed how safe Keytone crypto wallet is due to the air-gap design and 3 CC EAL5+ secure element chips. Here are some other safety measures I liked:
PCI-Level Anti-Tamper Features: The Keystone 3 Pro is built to literally protect itself from physical attacks. Someone trying to open or take apart the device without permission will trigger anti-tamper mechanisms. These will automatically and instantly erase all sensitive internal data, and this includes your private keys as well.

Fingerprint Authentication: The Keystone 3 Pro includes a fingerprint sensor for quick and easy access. Hence, you can use your fingerprint to unlock the device or to quickly approve transactions.
Anti-Blind Signing Technology: Sometimes, details for complex transactions, like for DeFi or NFTs, can look like a jumbled mess of code. Keystone’s “anti-blind signing” helps me by decoding and showing complex transaction details in plain, easy-to-read words on its large 4-inch screen. I can clearly see what I’m actually approving, which stops me from accidentally signing a bad transaction.
Open Source (Firmware and Hardware): Keystone officially states that both its firmware (the software inside the device) and hardware designs are open source. This means independent security experts and the wider crypto community can openly review the code and design.
How Much Does Keystone 3 Pro Cost to Buy?
I bought Keystone 3 Pro for $149, along with taxes and shipping charges. The Keystone 3 Pro is currently priced at $129, inclusive of all taxes and free shipping. So, it seems like the price has come down a bit, which is good to see. I recommend you buy it directly from Keystone’s international website (keyst.one/shop).
If you want a BTC-only wallet, check out my article on the most secure hardware wallets for Bitcoin.
My Final Review of Keystone Wallet
So, after spending a good amount of time with the Keystone 3 Pro review, going through the unboxing, the setup, sending, and receiving coins, I’ve got my final thoughts. Here’s what I truly like and what I don’t:
Advantages of Using Keystone 3 Pro:
First off, the air-gapped security is best. All those QR code scans might take a tiny bit longer, but for someone like me who values top-tier isolation, it’s totally worth it. The triple Secure Element chips and the anti-tamper features are also totally worth it.
Then there’s that big 4-inch touchscreen. It makes reviewing transaction details incredibly easy. And the fingerprint sensor is a nice touch for quick unlocks. Also, its MetaMask compatibility is fantastic, letting me use Web3 apps securely without risking my keys.
Disadvantages of Using Keystone 3 Pro:
The biggest bummer for me was the MicroSD card not being in the box. You need it for some firmware updates, and it’s just an extra step and cost right out of the gate. Also, the transaction process with QR codes can be a bit slow.
Finally, the lack of native staking directly on the device or its companion app is a miss. I have to go through third-party wallets for staking, which adds more steps and isn’t as seamless as what some other wallets offer.